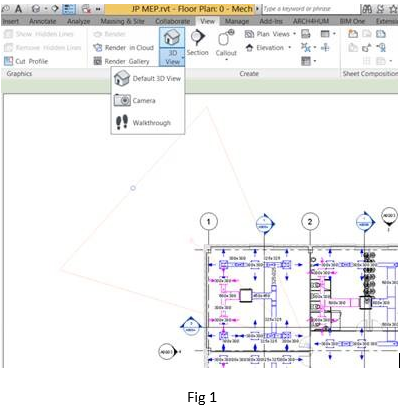
Revit 3d View Choose Floor
Video Create A 3d Detail Revit Products 2019 Autodesk Knowledge Network

Solved How To Draw Floor Autodesk Community Revit Products

Revit 2019 Levels In 3d Views Youtube

Solved Floor Layers Appearance In 3d Views Autodesk Community Revit Products

How To Fix A Revit Family In Plan View
Levels Are Not Visible In Section Or Elevation Views In Revit Revit Products Autodesk Knowledge Network
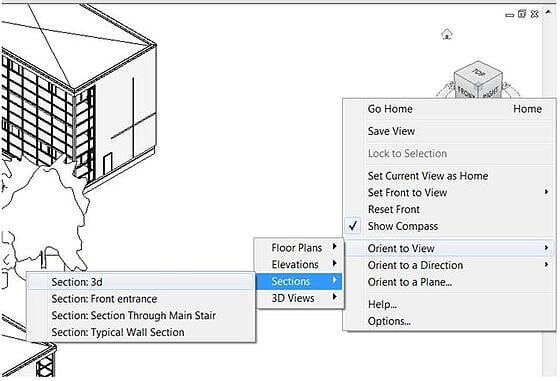
Copy the default 3d view right click on view and choose copy 2.
Revit 3d view choose floor.

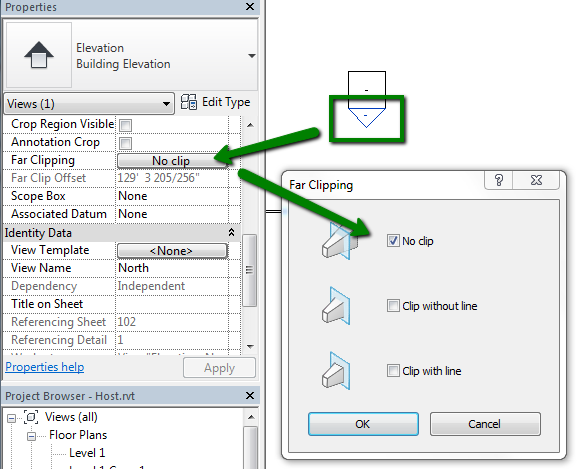
Solved Revit 2017 Can T Rotate Crop Region Autodesk Community Revit Products

Wall Heights Will Not Change Autodesk Community Revit Products

Solved Weird Semi Wireframe View Autodesk Community Revit Products

How To Create 3d Perspective Plans And Sections In Revit 8020 Bim

Solved 3d View Not Visible Autodesk Community Revit Products
Enhanced Realistic Views Have You Tried Revit Products 2021 Autodesk Knowledge Network
3d Isometric Sectioning With Autodesk Revit

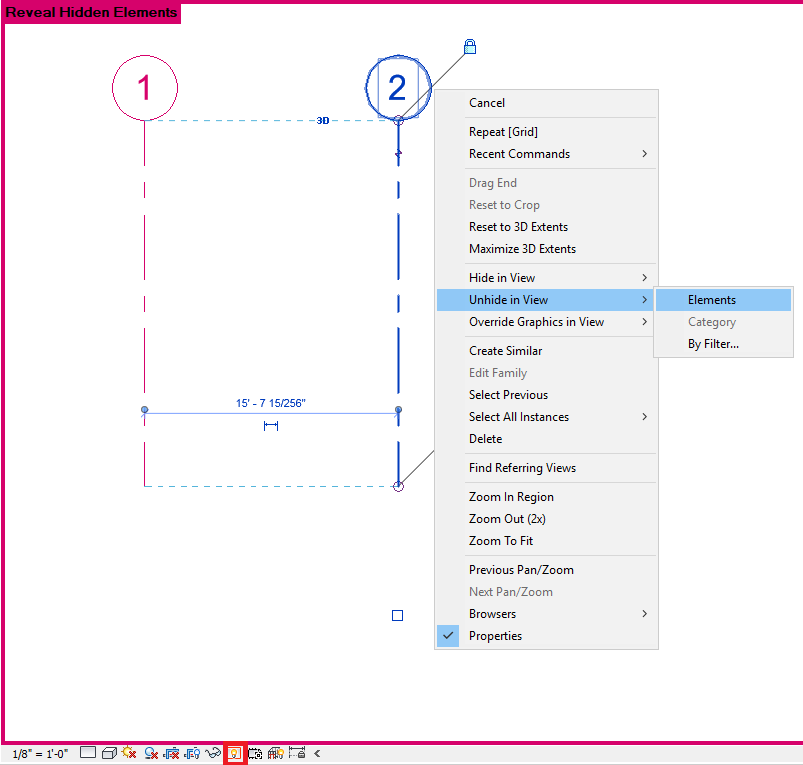
Solved Hide Lines Between Two Element In Plan Autodesk Community Revit Products
Selection Essential Skill Revit Products 2019 Autodesk Knowledge Network
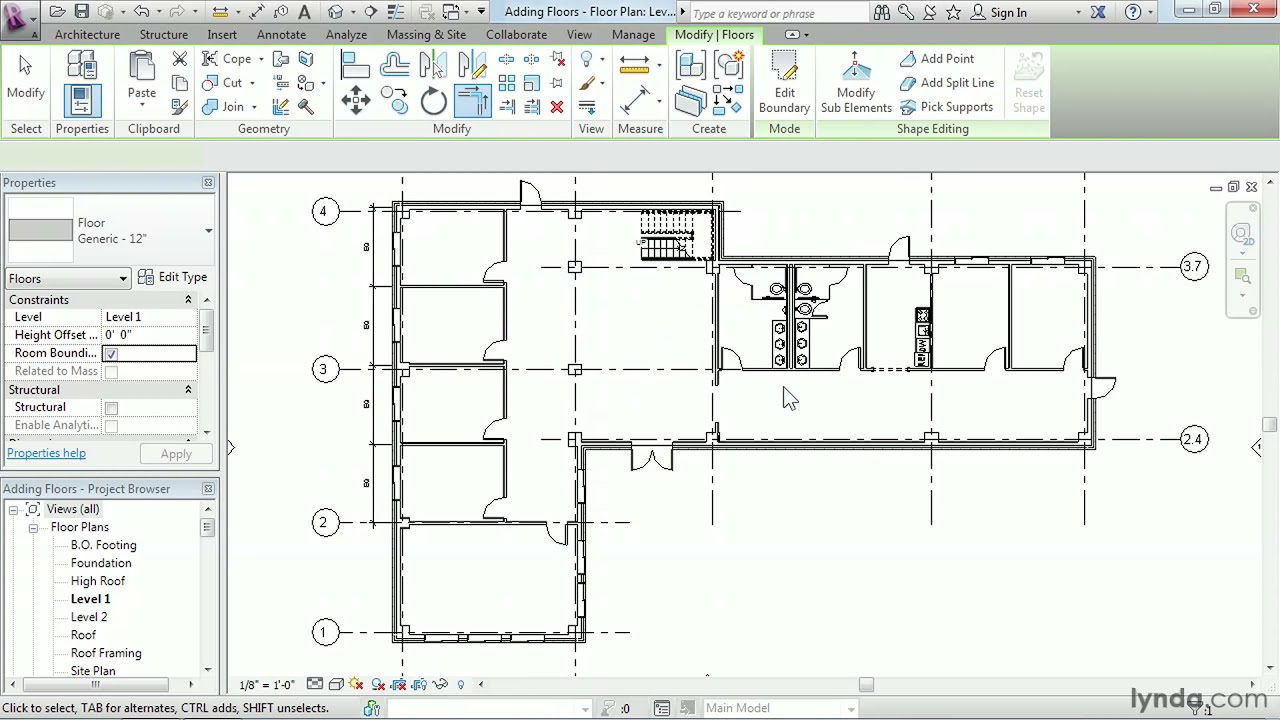
Revit Architecture How To Work With Floors Lynda Com Tutorial Youtube
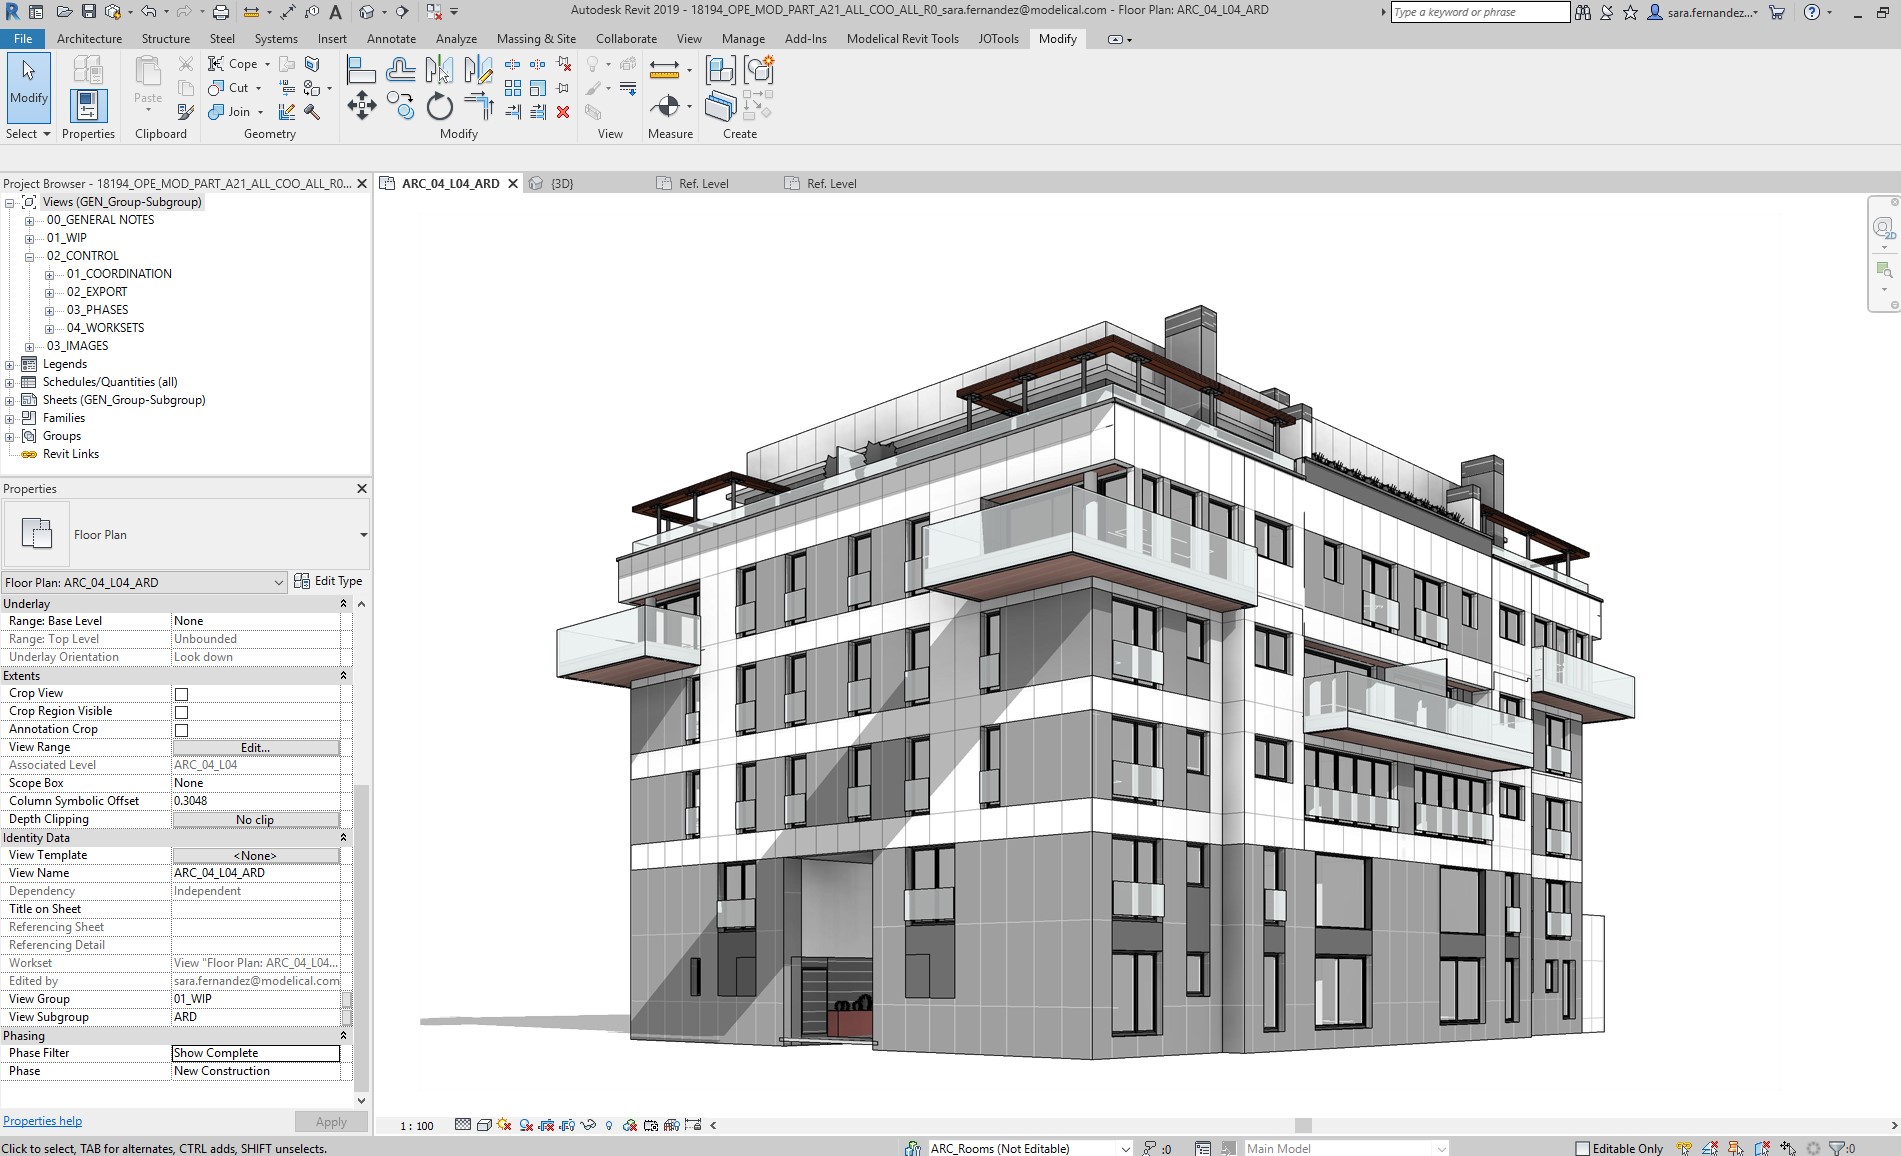
Revit Architecture Best Practices Modelical

Steel Columns Will Not Show Up On Floor Plans Autodesk Community Revit Products

Parts Of The User Interface Revit Lt 2019 Autodesk Knowledge Network
Revit 2020 Show Camera In 3d View Error Cadline Community
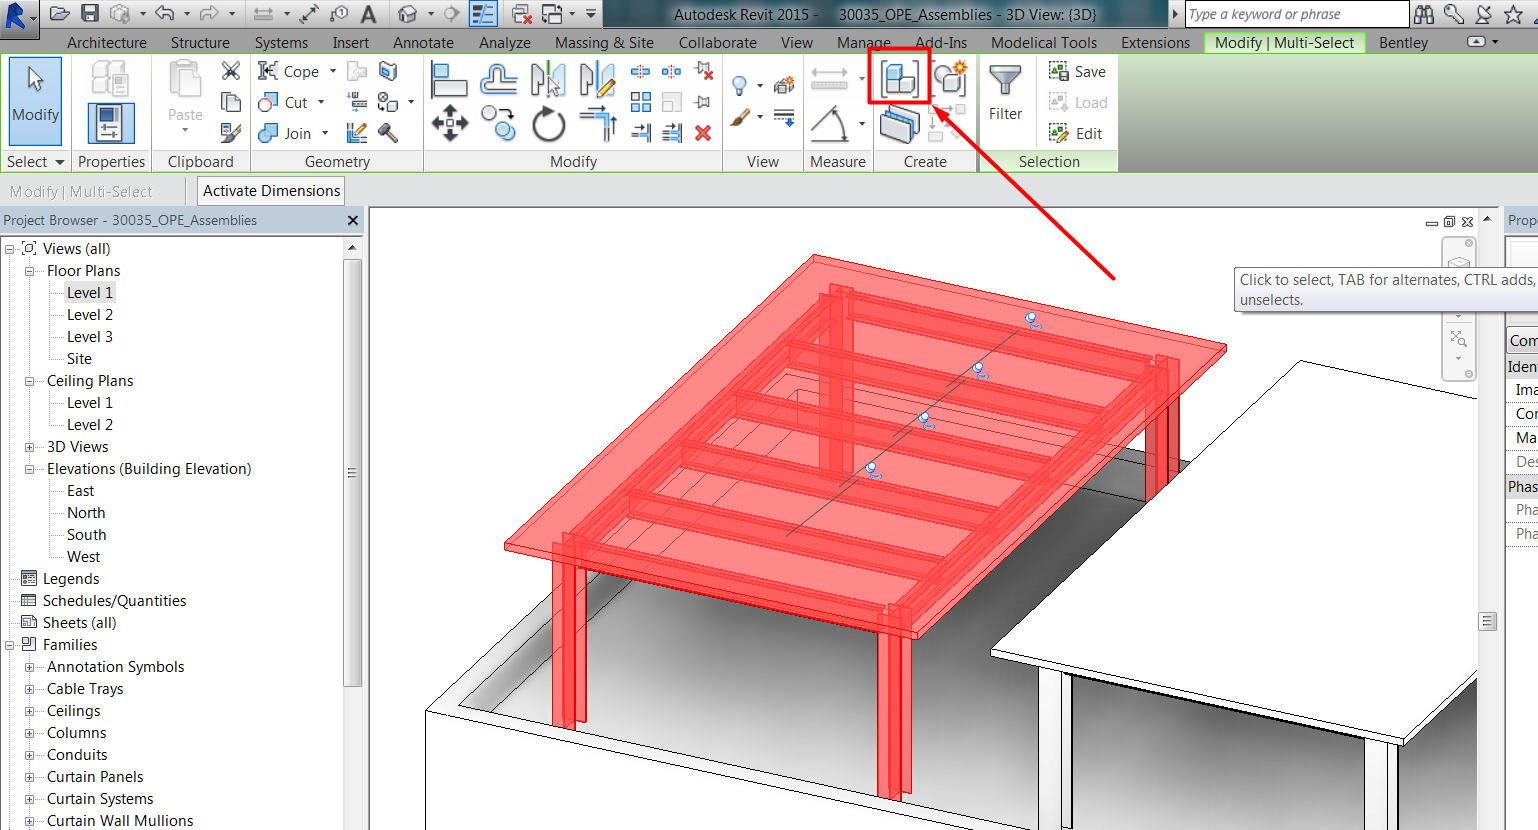
Assemblies And Parts Operation In Revit Modelical
Grids Are Not Showing On All Floor Plan Views In Revit Model Revit Products Autodesk Knowledge Network

How To Create Massing Floor In Revit Youtube

Rendering Revit Products 2019 Autodesk Knowledge Network
Https Encrypted Tbn0 Gstatic Com Images Q Tbn 3aand9gcqeeim98o89gy0el1chgmbw 1vtrczgdgqnmp5y29rkosw Teeq Usqp Cau

Solved How To Rotate A Loaded Family In Elevation View Plane Autodesk Community Revit Products
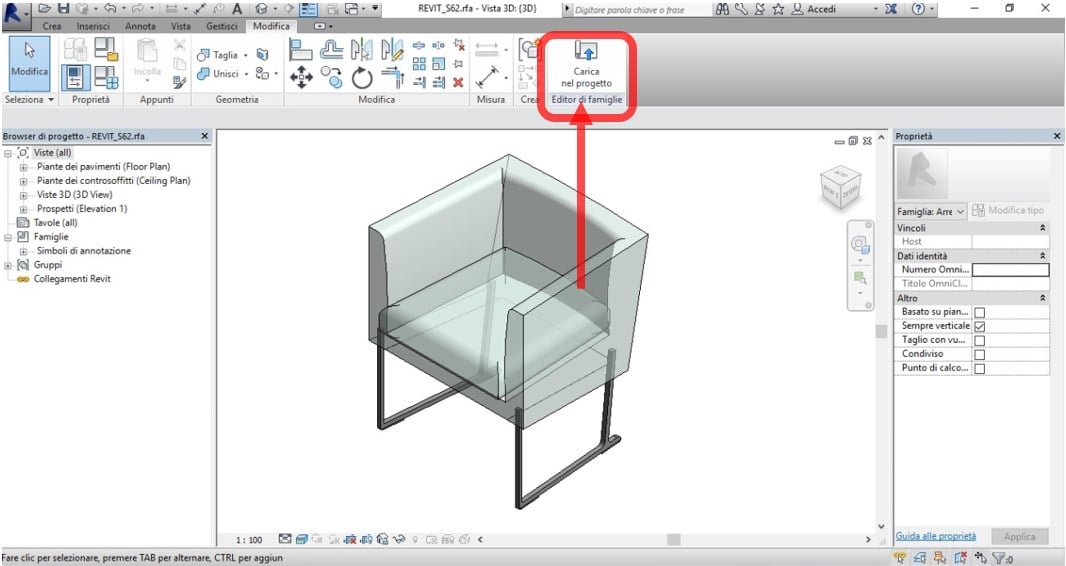
Tutorial 1 Creating A 3d Bim Furniture Object With Revit

1 Revit 3d Model Kerala Houses 2bhk House Plan Design

Selecting Views To Publish Revit Project On A360 The Field Of View

Ground Bottom Floor Not Visible On Top Level How To View All Levels Revit 2019 Solved Youtube
Source : pinterest.com
