Roof Leaks Where Roof Meets Wall

12 Roof Repair Tips Find And Fix A Leaking Roof Roof Repair Diy Home Repair Leaking Roof

Pin On Framing

Pin On Roof

Pin On Home Improvement

10 Roof Problems And What To Do About Them Roof Problems Home Repairs Leaking Roof

Pin On Back Porch

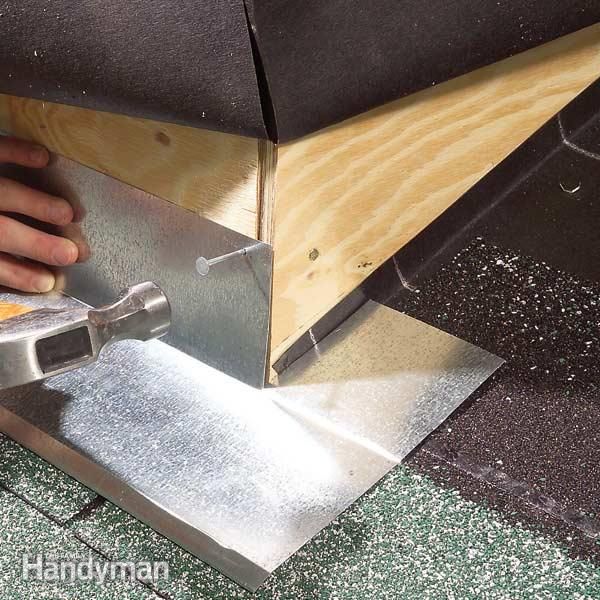
Dormer leaks can be caused from a number of issues.
Roof leaks where roof meets wall.

Pin On For The Home

Heavy Membranes At Valley And Roof Deck Penetrations Building America Solution Center Roof Repair Diy Roofing Roof Repair

Pin On Building Science

Pin On Roof

Article About Framing A Roof Saddle To Prevent Water Leakage Where The Roof Meets A Chimney Building Roof Roof Repair Roofing

12 Roof Repair Tips Find And Fix A Leaking Roof Roof Repair Leaky Roof Roofing Diy

Pin On Knowledge

Pin On Roof Repair

How To Inspect For Roof Leaks Roof Installation Roof Repair Leaky Roof

How To Hire A Contractor Replace Roof Leaking Roof Roof Siding

Pin On Roofs
Pin On Remodels And Renovating

Pin On Metal Roofs

Pin On Informative

Pin On Skylite

Pin On Exterior Projects

Pin On Diy Outdoor Projects

Pin On Are Test Prep
Https Encrypted Tbn0 Gstatic Com Images Q Tbn 3aand9gcthk Radxm Tk9mzfeyuebbcb2ixkn Qb9tqeefvpnyzzhcgtfz Usqp Cau

Article About Framing A Roof Saddle To Prevent Water Leakage Where The Roof Meets A Chimney Building Roof Roof Roofing Diy

Chimney Repair 3 Most Common Reasons Chimneys Leak Roof Roof Repair Home Construction

Problem Parapet This Is What I See On A Regular Basis Everything Is Wrong Air Leakage Into And Out Of Everything And Everywhe Parapet Roof Detail Roof Design

Copper Cricket Installation On Chimney Metal Roof Chimney Design Sheet Metal Fabrication

12 Roof Repair Tips Find And Fix A Leaking Roof With Images Leaking Roof Roof Repair Roof Repair Diy
Source : pinterest.com
